
How does an extra $1,000 per month sound to you? Are you ready take control of your life, get out of debt, and live the life you want with financial freedom?
You’re in the right place. Blogging is an excellent way to bring in the extra cash needed to pay down debt and gain financial freedom. Bringing in an extra $1,000 or more a month can be a huge financial boost. The extra cash is certainly a huge help to me in reaching my goals and living my dream. Who wouldn’t want an extra $12,000 or more a year? Plus, if done well, blogging can lead to a full-time, lucrative career! Of course this takes a lot of effort, but achieving your dreams is well worth it.
You may be wondering if you have the money or time to start a blog now. To be honest, the cost of starting a blog is so minimal, like one cup of coffee per month minimal. Plus, if you sign up for Bluehost web hosting through my exclusive link (click here) today, you’ll get a domain name and email address for free. For a cost of less than $50 per year, you can have an income earning tool of $12,000 or more per year. Yeah, I wanted to kick myself too for not doing it sooner. As for the time, it’s pretty minimal as well. Once your blog is set up, dedicating a couple of hours per week to write content is pretty easy to do. My best advice is to start now, start today. If you area serious about making extra cash to pay down debt and build wealth, don’t wait.
Now, the technical side of starting a blog may seem scary, but with awesome tools and platforms, it’s actually quite simple. The best news – just read this post – and you’ll learn step-by-step exactly how to do it! My goal is to help you write your own success story, so let’s get started.
- Determine your domain name – the web address or URL for your blog site
- Choose a website host – this is the company that will host your site and run it from their servers
- Choose a website platform – this is the content management system that powers your website
Let’s break each of these three down just a little bit more.
- Domain = broketobeach.com
Keep it short, simple, easy to spell, and reflective of your blog. I wanted to tell the journey from being broke to one of financial independence enjoying life on the beach, so I chose BrokeToBeach.com. Make sure it’s available, and don’t be tempted to buy one on a different site as you’ll be tossing your money away. You can get a free domain name and email on Bluehost when you choose your hosting package using my exclusive link (click here).
I made that mistake and learned the hard way, so I had to transfer it over to BlueHost. Live and learn.
- Host = Bluehost
I have done lots of research on hosting companies and have built and managed several websites for various companies using many host companies. Bluehost is by far one of the easiest and best to support and host a WordPress blog. The admin panel is way more user friendly than others. Live chat is amazing and has saved me a couple of times from what could have been lot of frustration.
- Platform = WordPress
The large majority of blogs and websites in the world are powered by WordPress. It is hands down the best platform to build and grow your blog on. WordPress makes it simple to build and post and comes free with Bluehost. Even better, you can download and install WordPress directly through Bluehost. A standard practice to save tons of time is to use their service to install a theme making life simple and easy. WordPress allows you to make money on and grow your blog through ads, plugins, and payment.
Step-By-Step Guide: Start A Blog With WordPress And Bluehost
-
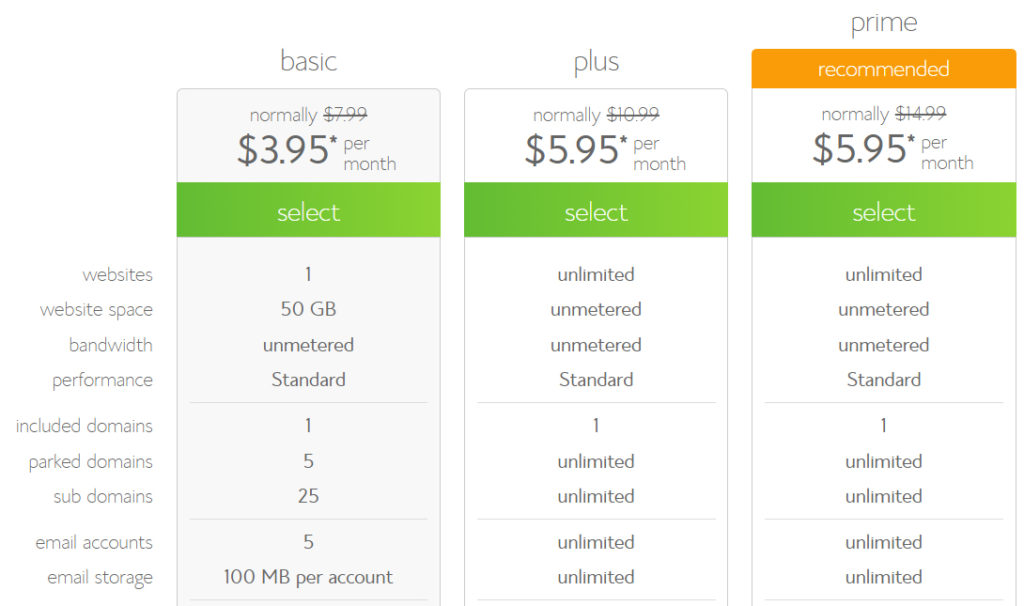
Select Your Hosting Plan
Get a free domain and email through BlueHost with my exclusive link (click here). Sign up for 12 months of service or more. You’ll get the best value if you sign up for 36 months. Basic is the cheapest, and should be perfectly fine to start with. As your blog grows, you can switch to the Plus or Prime as you need. You can click the image below to select your hosting plan. Keep this web page handy to continue following the steps.
-
Register Your Domain
- Enter your domain name in the left box. No need to enter “www” before the name. Click next.

- Enter your account information and select the length of service.
- There will be a bunch of optional add-on services. I did choose domain privacy protection, but it’s not necessary. It does protect your email that you use to register the domain from getting spammed.
- Enter in payment information (entire hosting amount is charged up-front). Agree to terms. Click submit.
- Create your site’s password – the weirder the better – use numbers, letters, and special characters for your own protection. Plan on writing this one down and keeping it in a safe place instead of trying to remember it!
-
Install WordPress
Congrats, you’re almost done!
- Click the login button that you saw after creating your site password.
- Bluehost will ask you to pick a theme for your site. Find the one you like best knowing that you can always change it later.
- Click the “Start Building” button and it will take you to your WordPress dashboard.
- You will be given the option to choose a business or personal site. Choose the one that applies to you or choose “I don’t need help”.
- To bring your site online, you’ll need to click the “Launch” button on your WordPress dashboard when you’re ready.
That’s it for now! Nice work!
For future log-in, you can either go through Bluehost, or you can sign in to WordPress by typing in “mysitenamehere.com/wp-admin” and using username Bluehost emailed to you and the password you created earlier.
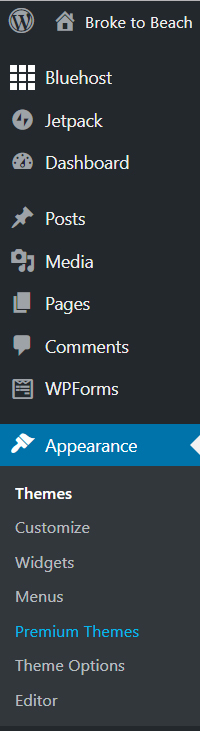
If you want to change your theme or purchase one so that your blog is more customized, once on your WordPress Dashboard, select Appearance, and you can choose Themes (free) or Premium Themes ($$). A free theme is perfectly fine. I chose to purchase a premium theme for $49 to get a more unique look.
One of the best services I’ve learned to “love” paying for is the option to have Mojo marketplace, which is available through Bluehost, to “Make my WordPress Site Look Like the Theme Demo”. It costs about $150 for this service, but gets your site up and going so much faster. Otherwise once you choose a theme, you are starting from scratch and the learning curve can be a bit tricky. I have found that it’s much easier to start with the theme demo that you liked, and customize the pages and content from there.
-
Keep The Momentum Going!
Now that you have the initial technical setup mastered, keep the momentum going. Stay excited, brainstorm topics, and get creative. This blog could very well be the next biggest opportunity of your life. It certainly was and still is for me.
I’m a mom, wife, business owner, debt crusher, budget cutter, and beach lover who wants to help others create their own success story. Stick with it and make the time to give it a go and learn a lot along the way. Who knows – maybe we’ll run into each other one day blogging from the beach!
In case you need it one more time, here’s my exclusive link to get started with your own Bluehost blog, free domain and email (click here).